
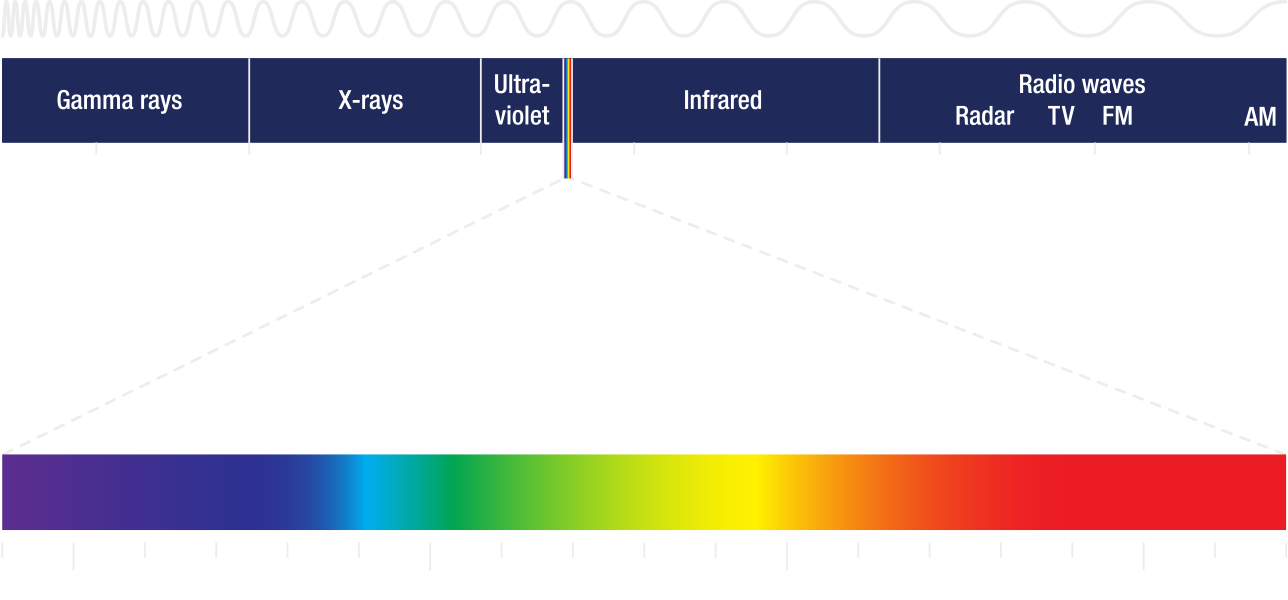
Visible light manifests itself in the form of waves within the electromagnetic spectrum. Human eyes can only register a part of the color spectrum known as VIBGYOR: Violet, Indigo, Blue, Green, Yellow, Orange and Red. On the far ends, however, exist two other colors that, though not visible to human eyes, also belong in the light spectrum and can be captured with the right method and technology: Ultraviolet (ca 100-400nm) and Infrared (ca 700-1000nm). 720nm is the most common wavelength for capturing Infrared photography. This is where the gallery's name originates from.
When talking about the Infrared spectrum of light, the longer amplitude of electromagnetic waves gives it a kind of flashlight effect. The contrasts are therefore often stronger and details sharper. Taking into account that IR photography is based on just one color — red — the tint will remain in reddish and pinkish tones. More so, due to Infrared light's reflective properties, some surfaces will show rather unique layouts. For instance: leaves and greenery will be depicted as very bright, while water and clear skies as very dark. Surface of the human skin is light and smooth, often without visible wrinkles or other imperfections that may exist.
Optimal source of all light, including Infrared, is of course the sun. Best results, therefore, can be achieved on bright, sunny and cloudless days in the exterior, under direct and strong sunlight. When considering studio photography, artificial illumination capable of producing the optimal type of light is filament based, which generates heat, such as incandescent and halogen. LED or neon, on the other hand, are unable to support IR photography.
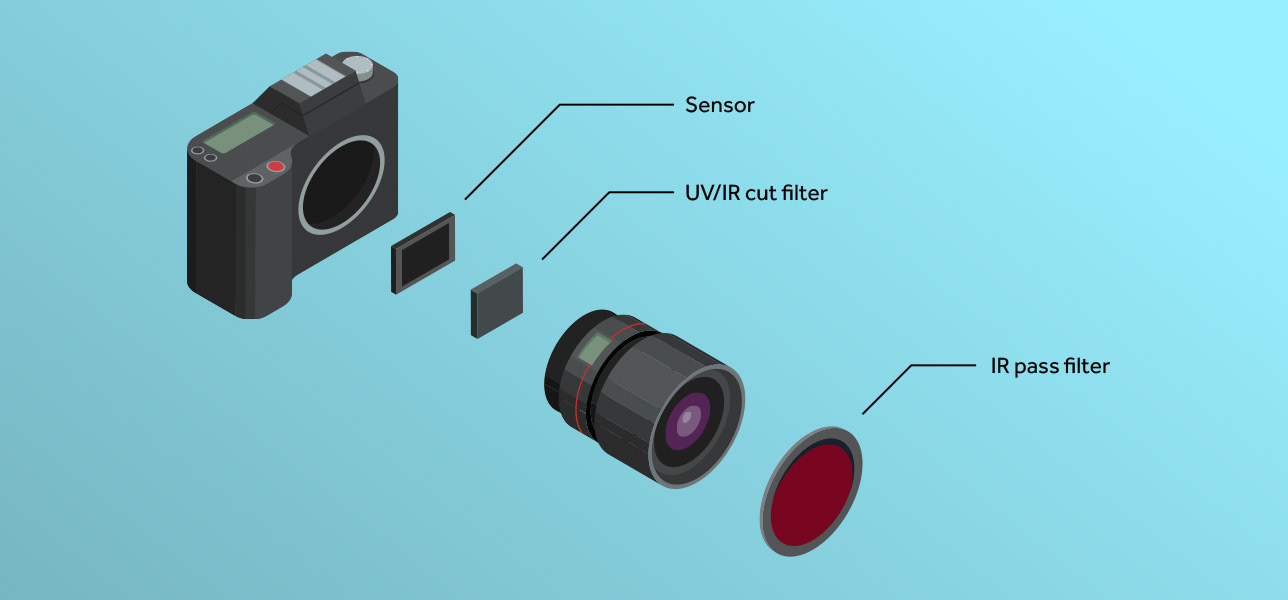
Any sensor can capture Infrared light, be it on a smart device or professional digital camera. Due to issues with autofocus in the IR spectrum, however, all devices are pre-installed with a UV/IR cut filter, which blocks UV and IR light rays, thus limiting the range to VIBGYOR. An IR pass filter (e.g. Hoya R72) is therefore a necessity. It exclusively allows the light from Infrared spectrum to reach the sensor, while blocking all else. In order to create Infrared photos with a digital device, there are two possible solutions:
1. IR pass filter without sensor modification: This method delivers results, albeit with some limitations. Infrared light can bypass the default UV/IR blocker, though only with large apertures, maximum ISO and very long exposures. Hand-held IR photography in this scenario is thus very hard to achieve.
2. IR pass filter with sensor modification: The pre-installed UV/IR cut filter is removed, which allows for hand-held photography and much more freedom with fine tuning. Yet, there are shortcomings in this case as well. The device in question will no longer be able to make classical photos without an external UV/IR cut filter applied. Otherwise, the camera will suffer from autofocus issues, while the photos themselves would feature a pinkish tint across their entire color spectrum. A camera so converted therefore covers the Full spectrum. DSLR and mirrorless cameras make the best candidates for this modification.
There are many possibilities for post-production of Infrared photography, mainly with the use of various Channel swapping techniques. Also, the best results are achieved when the capturing device is set to a Custom white balance, which removes most of the red tint.

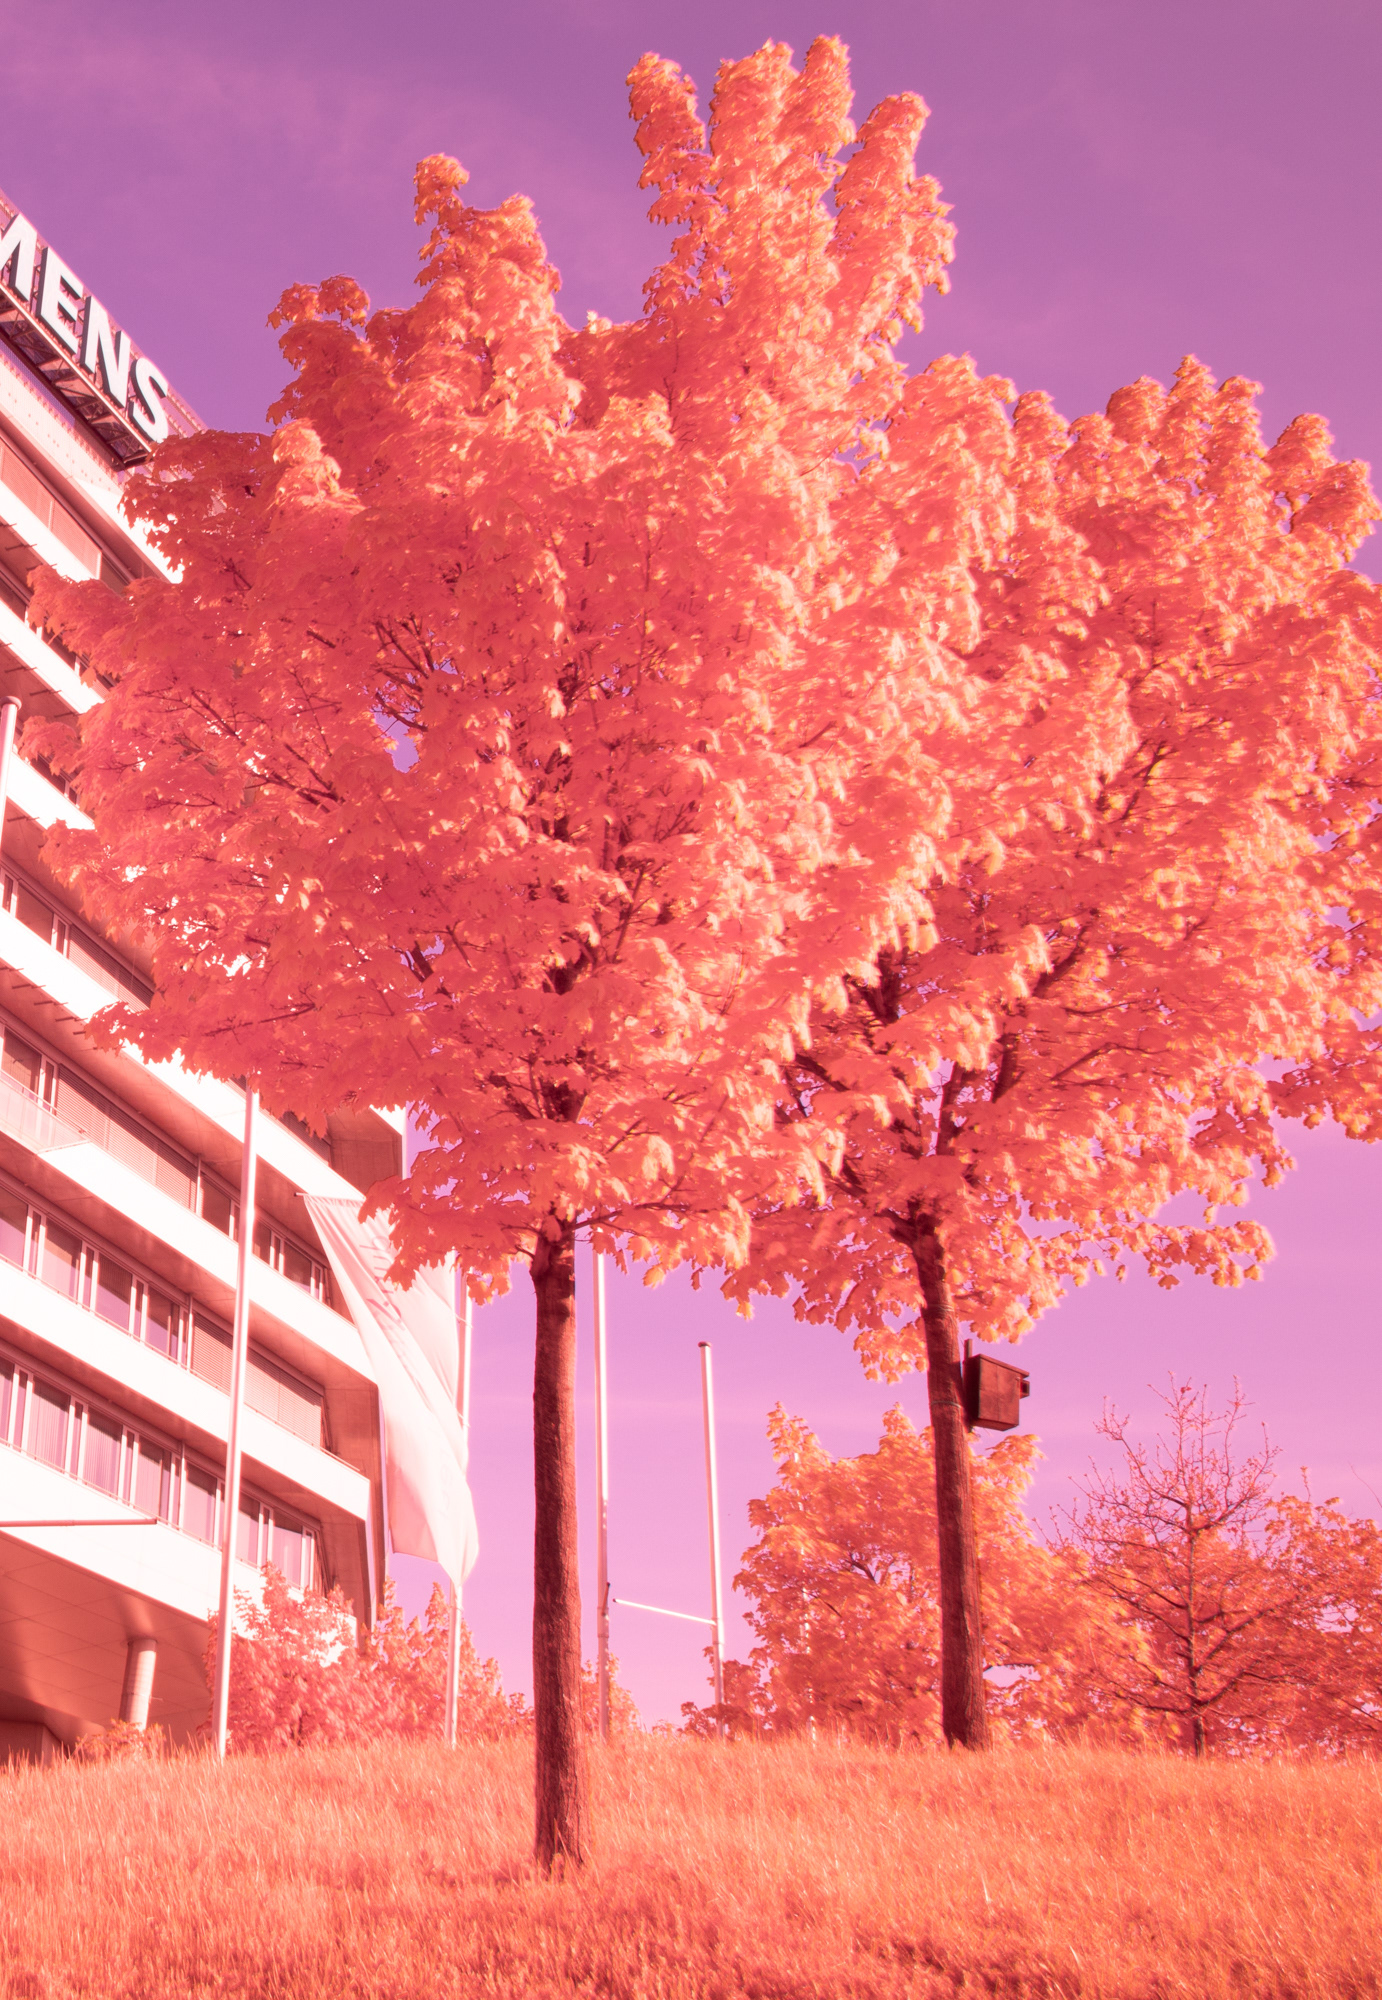
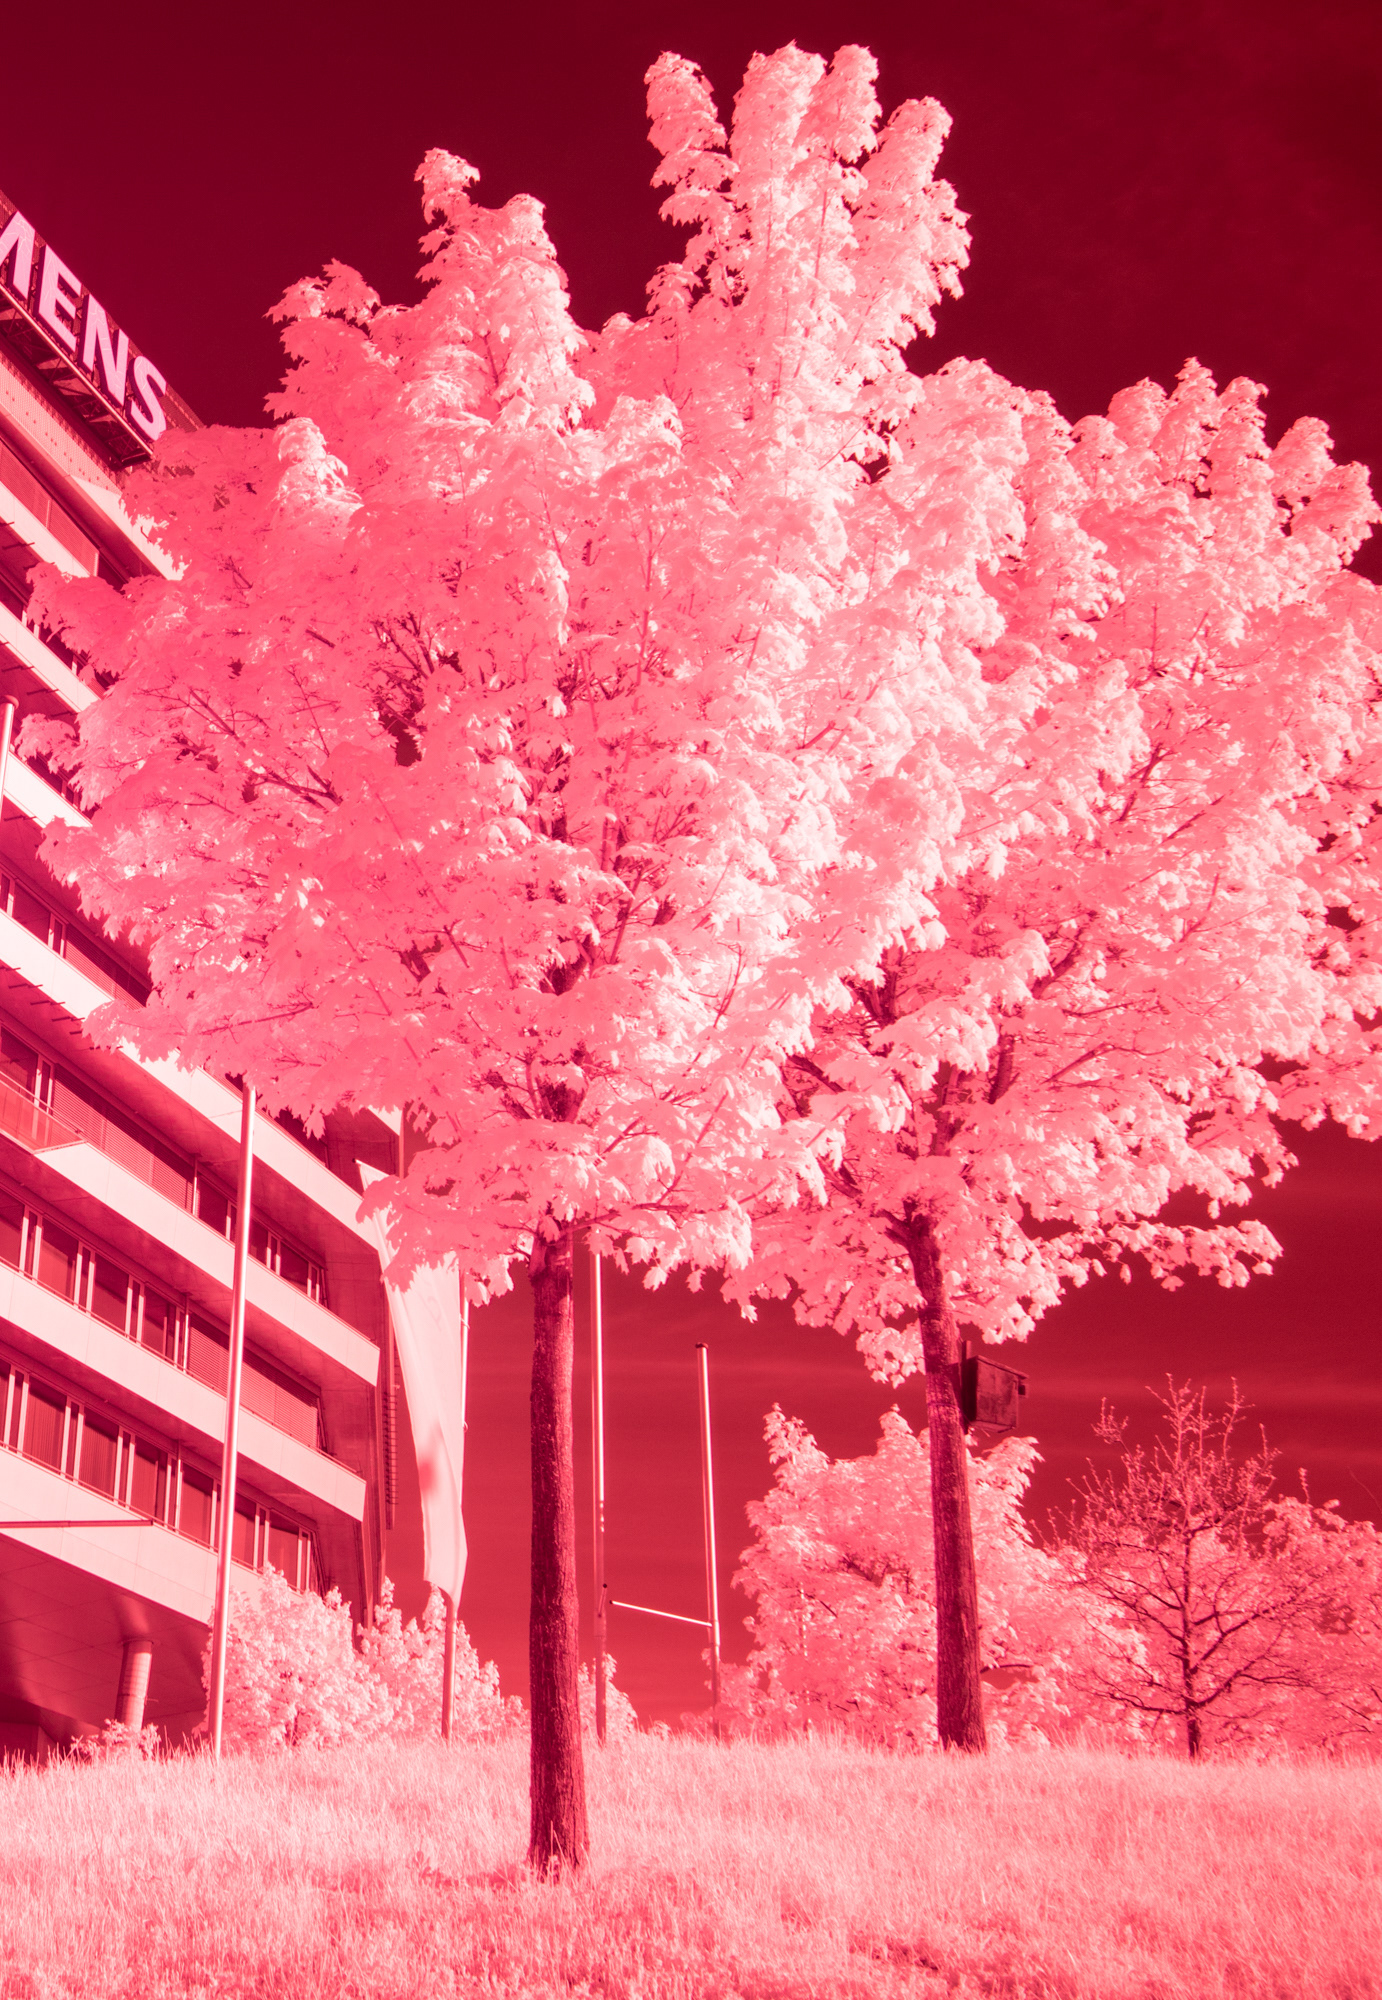
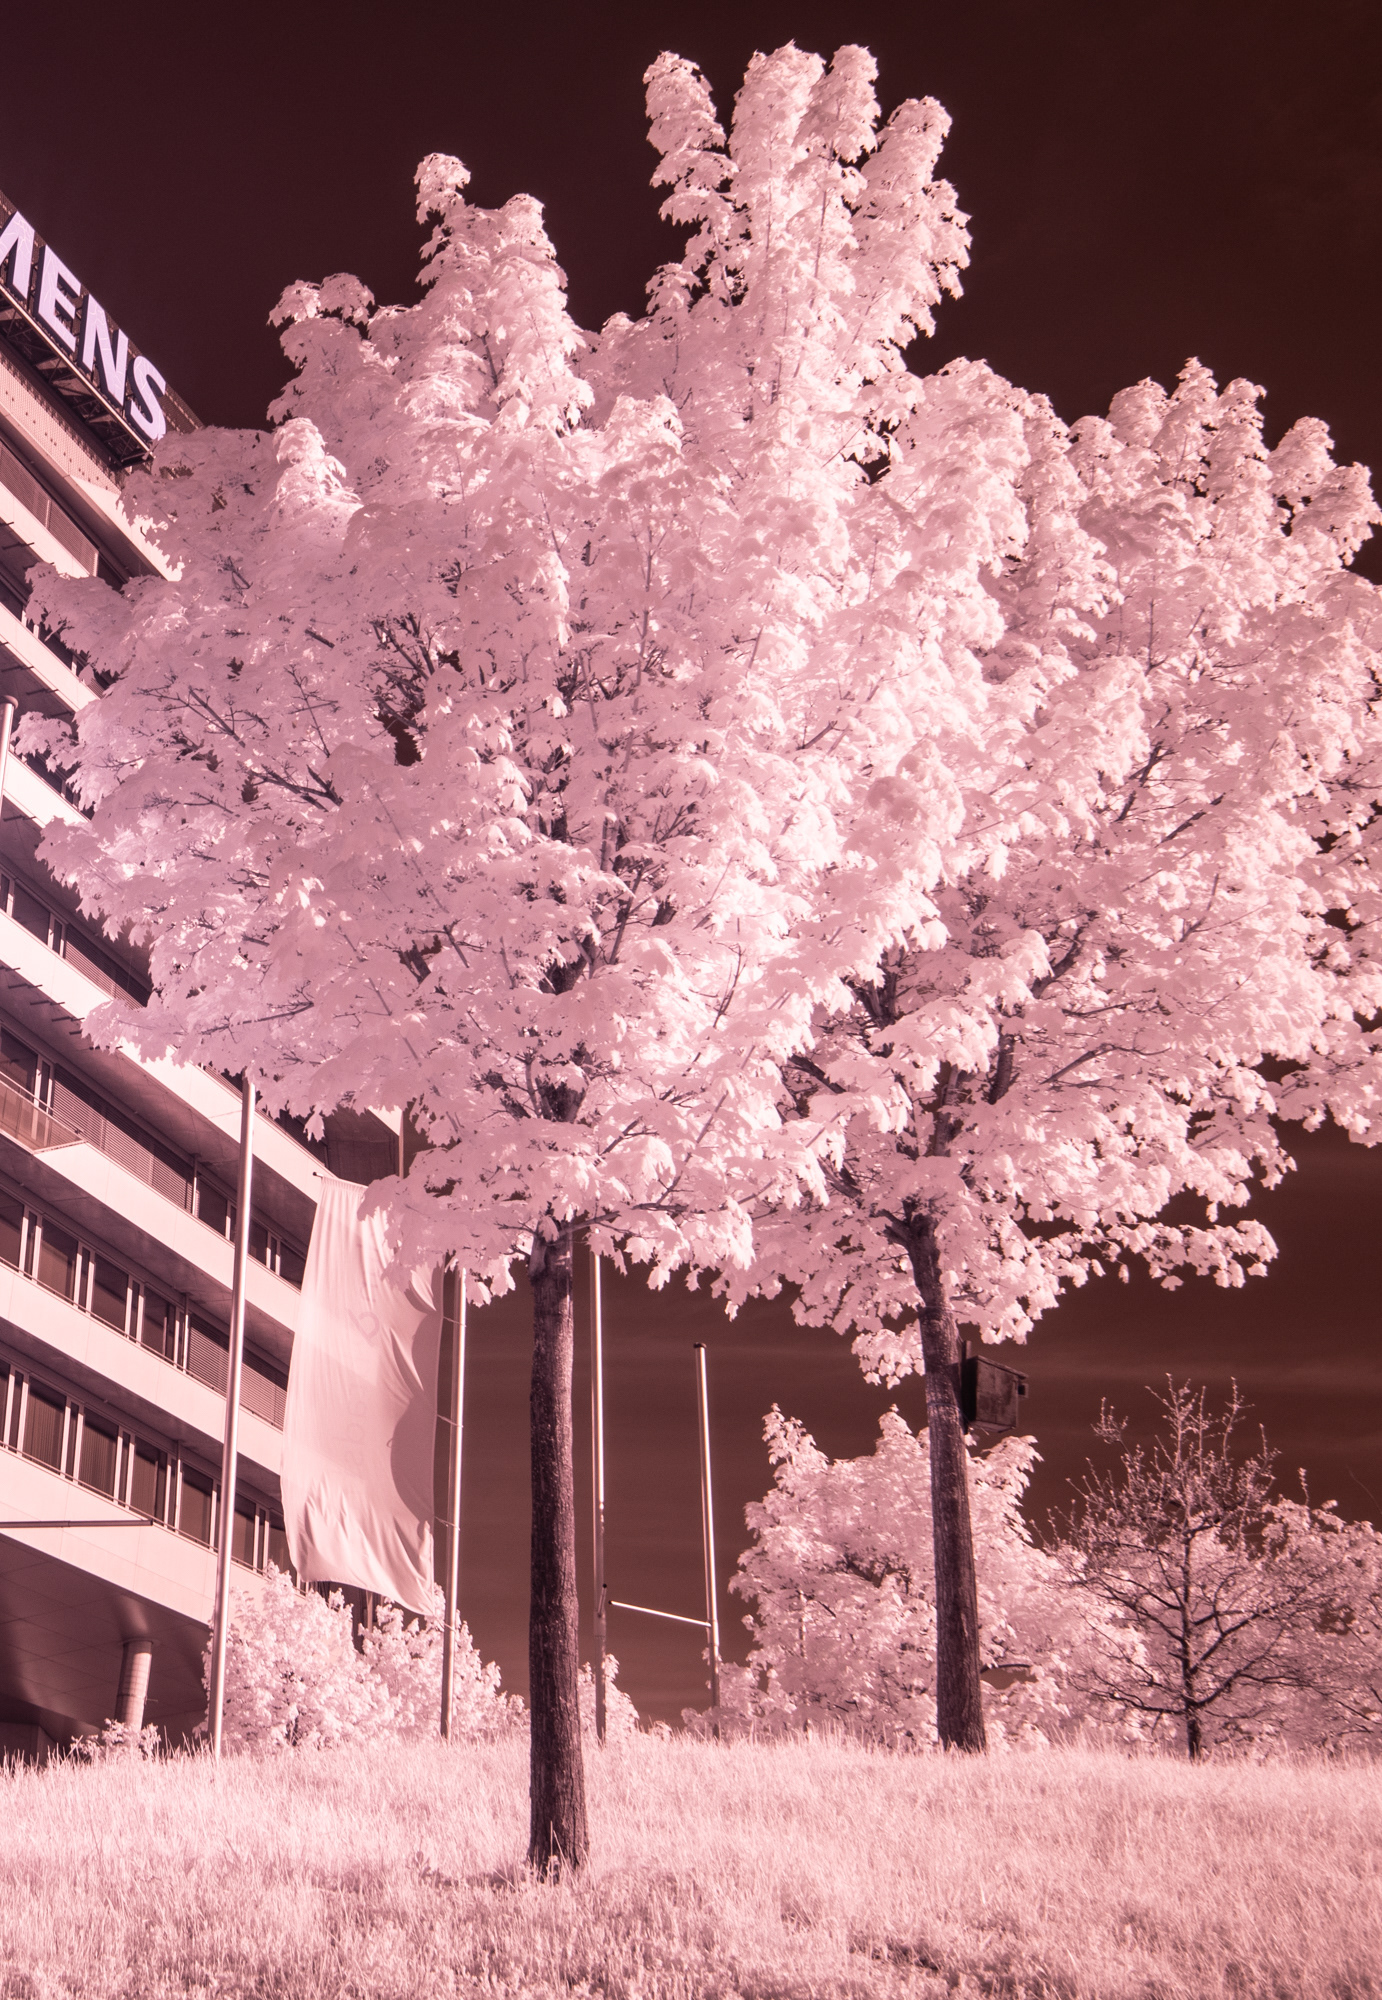
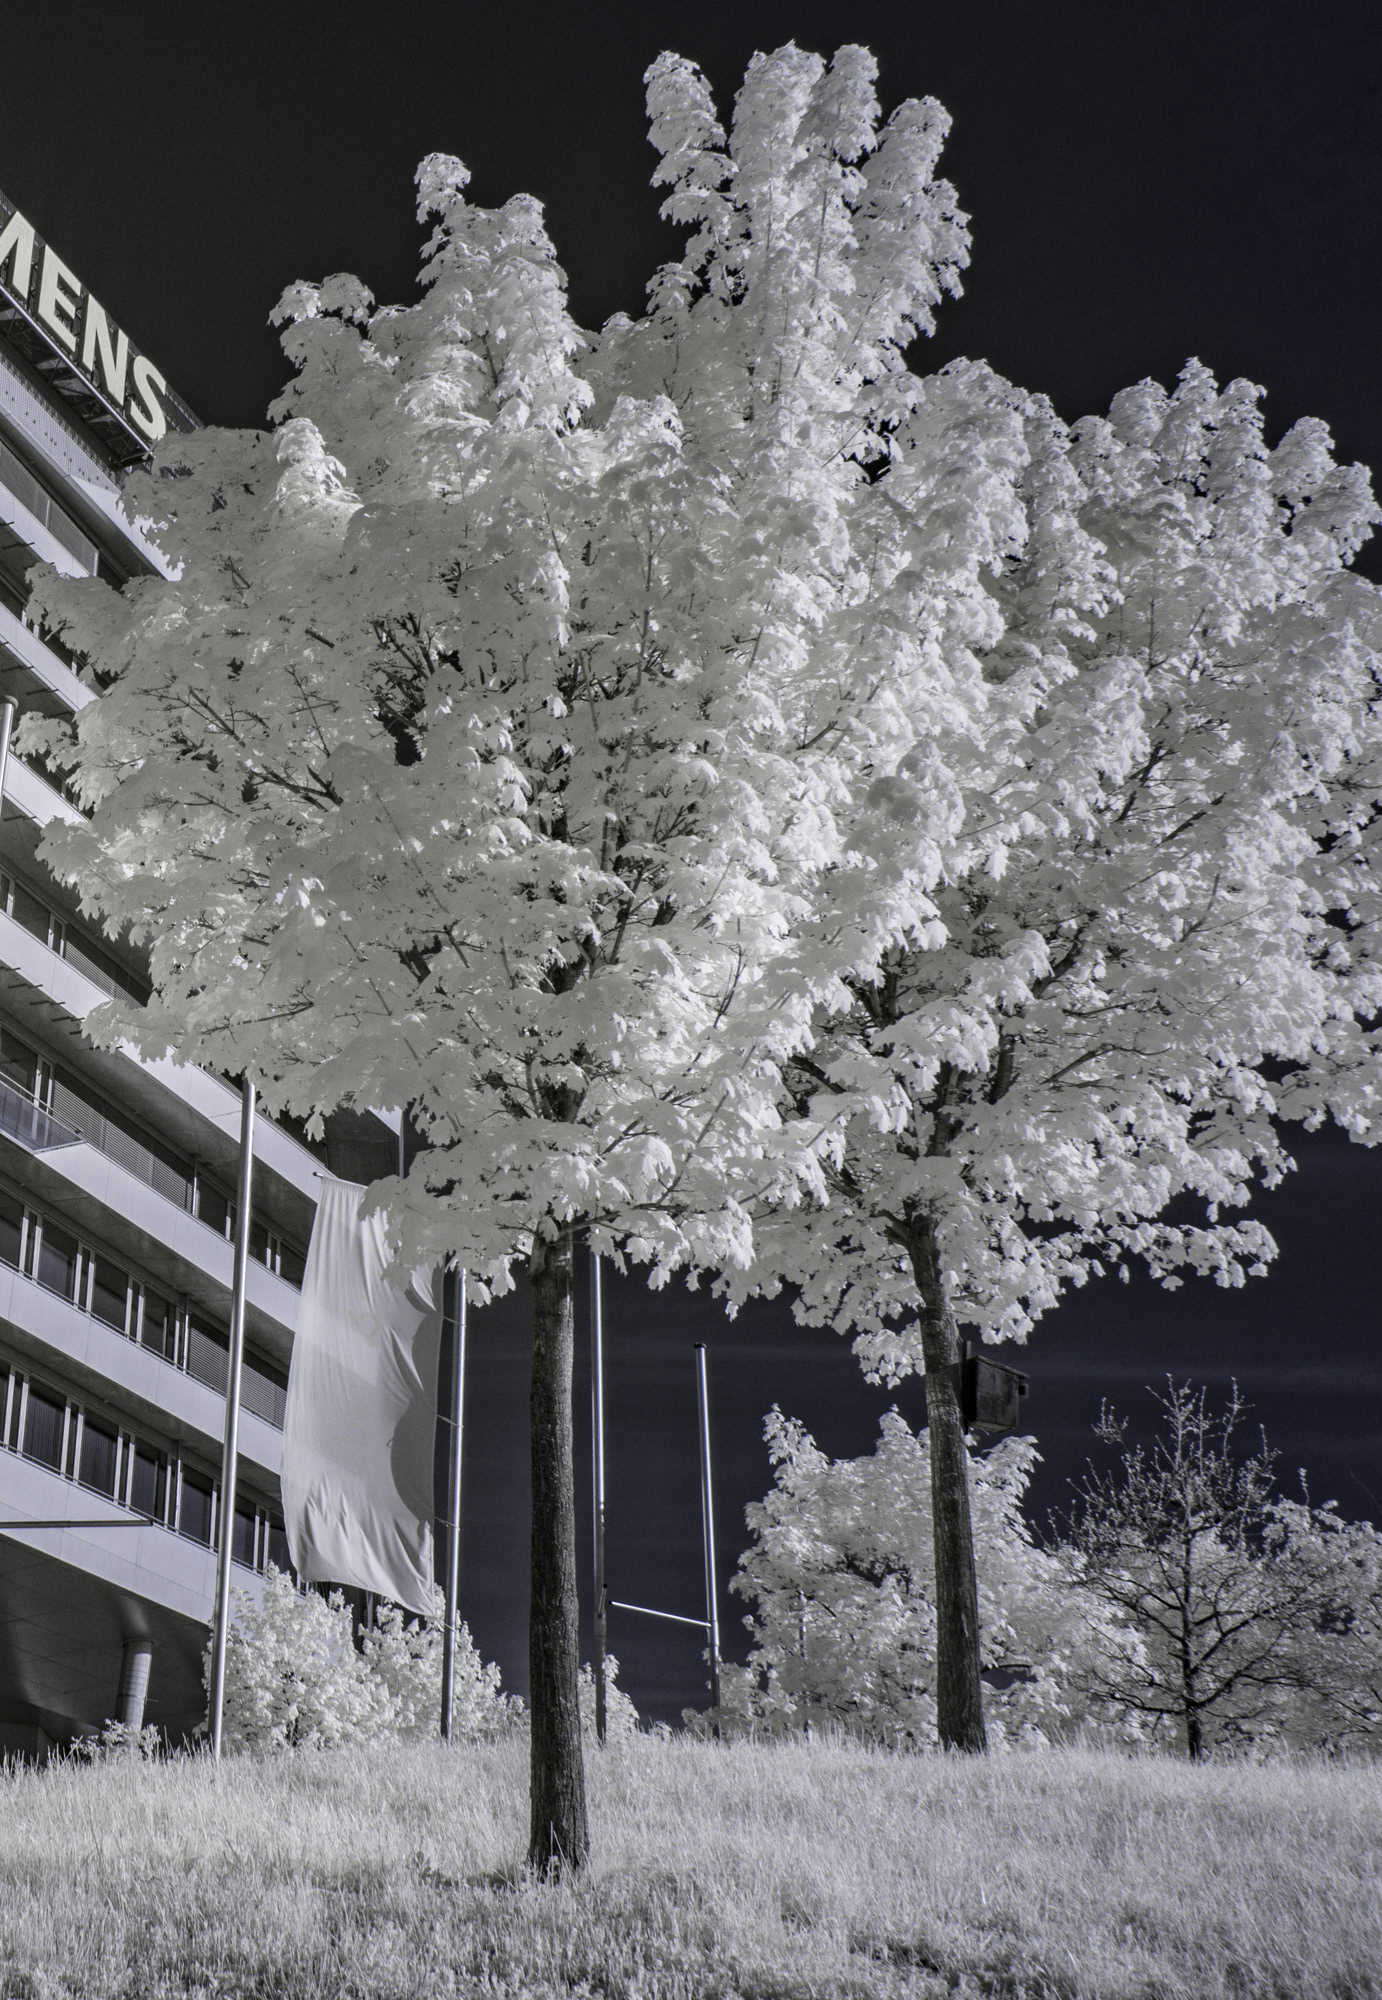
Examples of Infrared photography in order from the left:
1. VYBGIOR photo with UV/IR cut filter (classic photo)
2. VYBGIOR photo without UV/IR cut filter (full spectrum)
3. IR photo with Auto white balance: UV/IR cut filter removed, IR pass filter applied
4. IR photo with Custom white balance: UV/IR cut filter removed, IR pass filter applied
5. IR photo with Custom white balance and Channel swap: UV/IR cut filter removed, IR pass filter applied